Building a Java Application in the Eclipse IDE
This page was contributed by Daniel Schmid under the UPLIntroduction and Installation
The Eclipse IDE (or Eclipse for short) is a commonly used application that provides tooling that helps developers write, run and debug Java code. This article describes how to get started with Eclipse for developing Java applications.
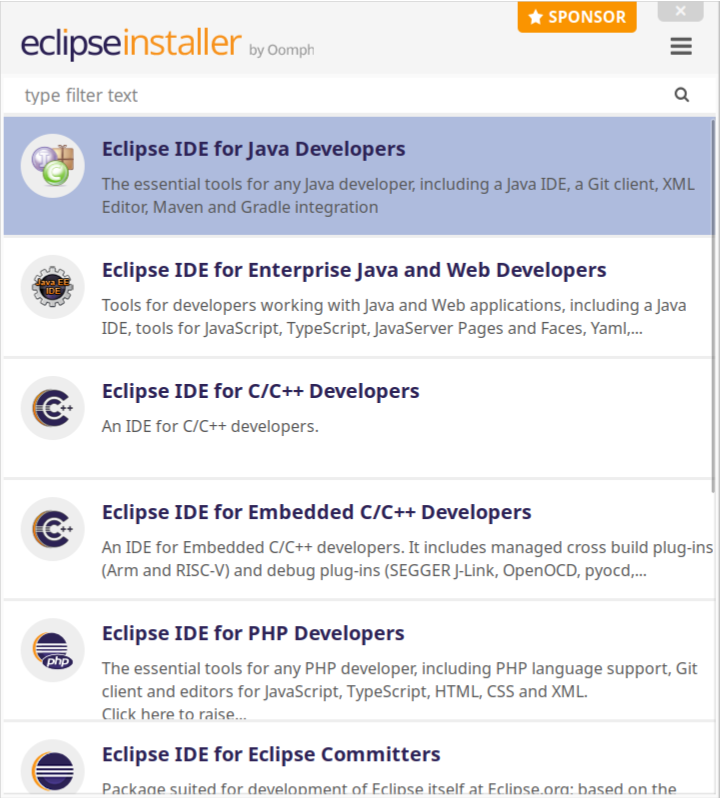
The easiest way to install Eclipse is to download and run the Eclipse installer from this site. This provides multiple options for packages to install. In most cases, Eclipse IDE for Java Developers is a good installation for Java development.
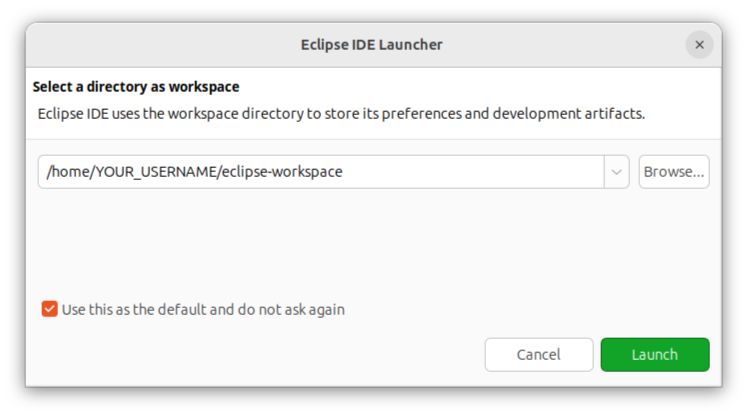
After installing Eclipse, you can select a workspace. The workspace is the directory where most projects are located.
Upon selecting a workspace, it will show a Welcome screen presenting you with multiple options. For example, there is an option to start an interactive tutorial that shows you how to create a simple Hello-World application.
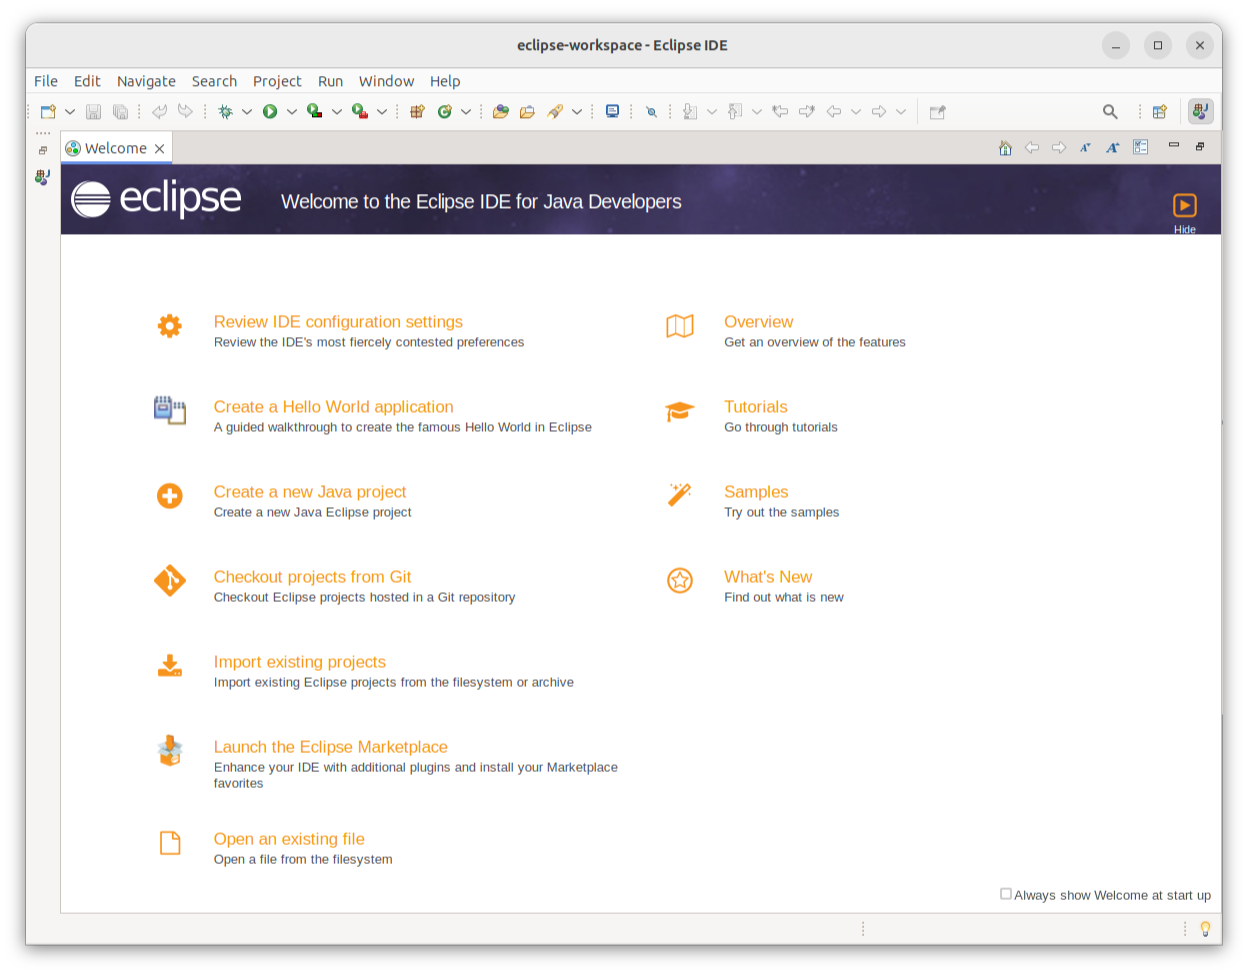
This article will show you how to create Java projects manually so you can close this Welcome screen by clicking on the Hide button on the top right of the Welcome tab.
Creating a Java Project
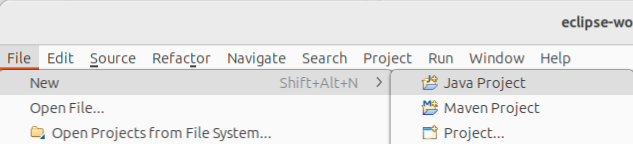
After installing Eclipse you should have an empty workspace. In order to create a new Java project, click on the File toolbar in the top left corner of the Eclipse window and select New > Java Project.
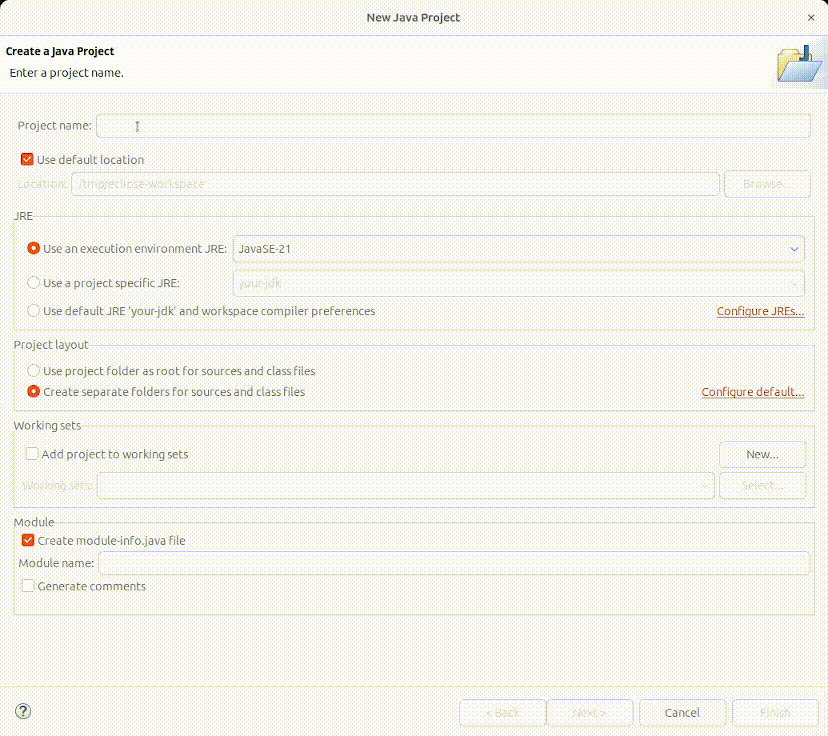
This will then open up a dialog window that allows you to configure your project. You will need to enter a name next to Project name: at the top. For example, you can choose the name HelloWorld. In the Module section at the bottom, disable the option Create module-info.java file. You can configure a custom Java installation (commonly referred to as the JDK or Java Development Kit) in the JRE box.
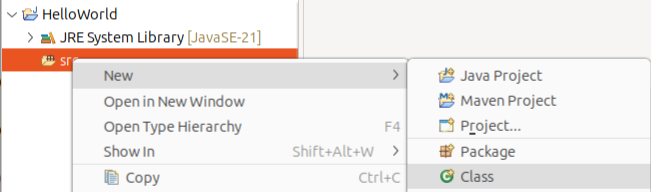
This creates a Java project that is shown on the left side of the Eclipse window. When expanding this project, there should be a folder named src. Java classes can be created inside this directory by right-clicking on it and selecting New > Class.
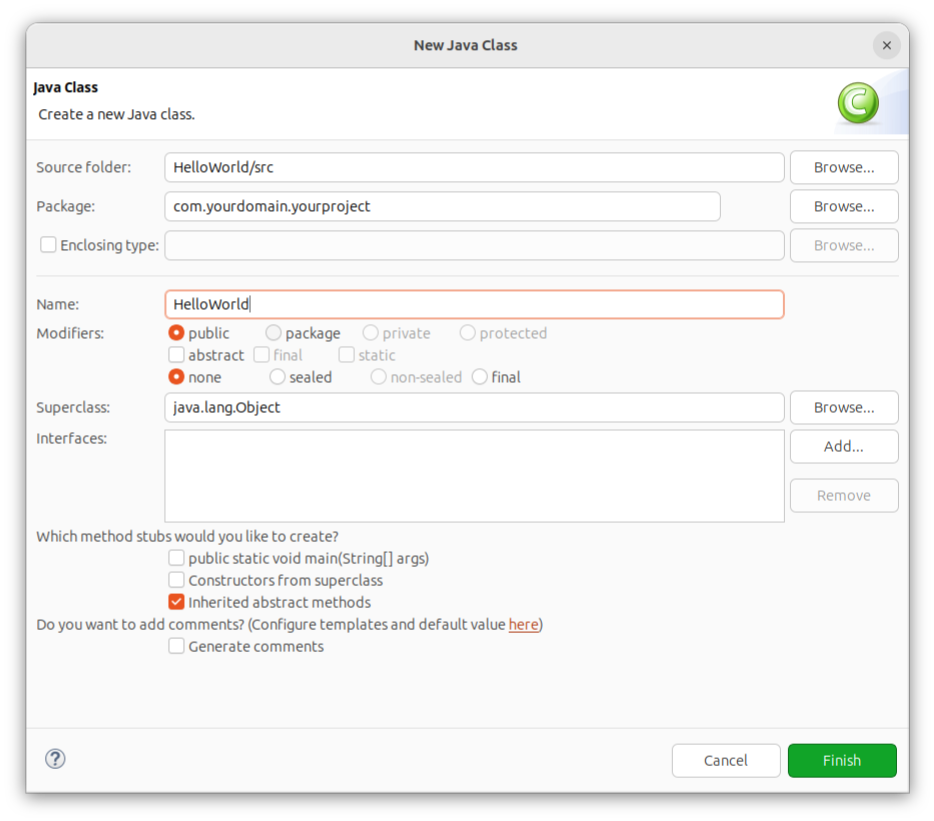
This opens a dialog similar to the project creation dialog. It allows specifying various options about the class you want to create. For now, you will need to enter a class name like HelloWorld. If you want to, you can also configure a package which can be used to group multiple classes together.
Content Assist
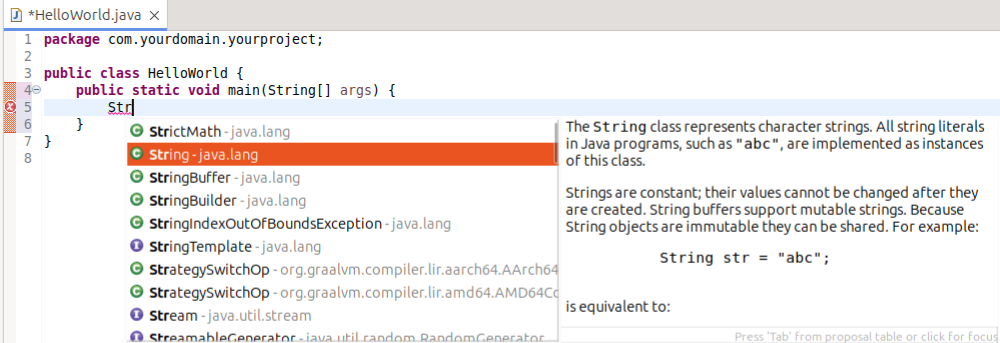
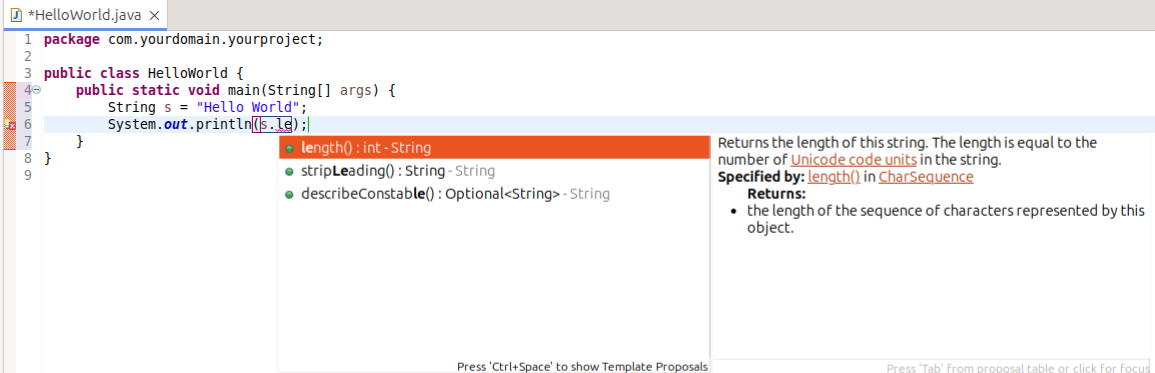
Eclipse can help you write Java code by automatically completing parts of it. When pressing the key combination Ctrl+Space (or ⌘+Space on macOS or Alt+/ on Chinese systems) while editing Java code, Eclipse automatically suggests ways to complete the code. These suggestions can be confirmed by pressing Enter or double-clicking on the suggestions.
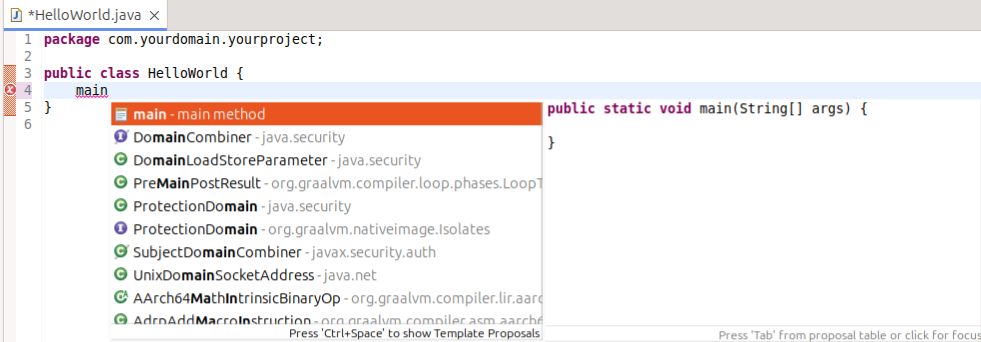
For example, typing main in a class followed by pressing Ctrl+Space suggests adding a main method.
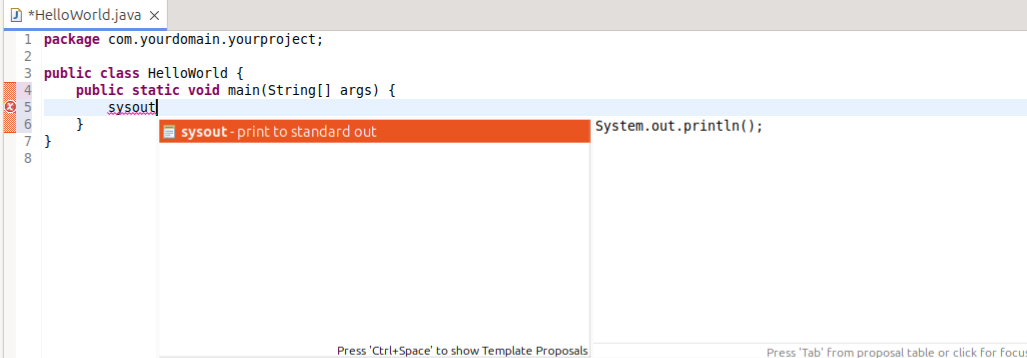
Inside methods, Eclipse can suggest changing sysout to a System.out.println(); statement.
Furthermore, it can complete class and method names.
Running Your Program
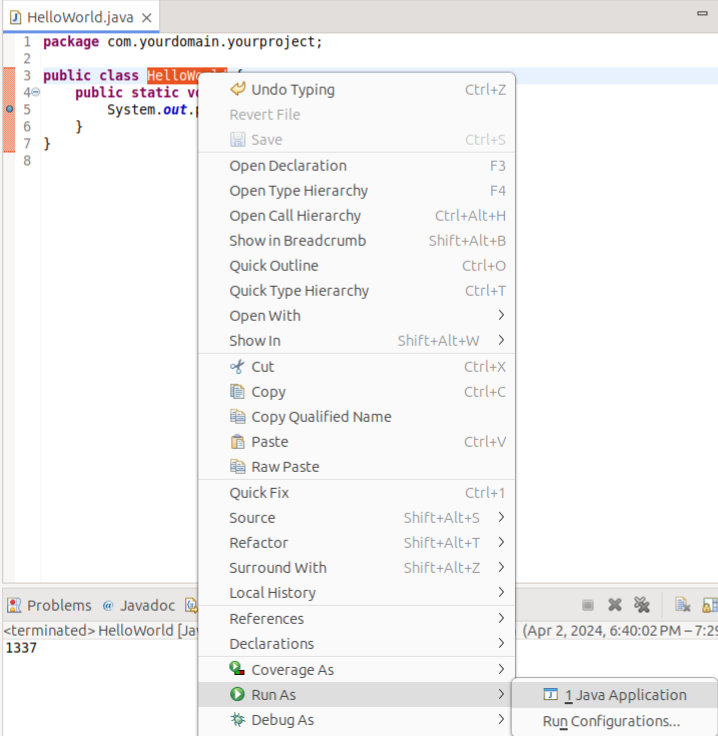
In order to run a Java application, you first need to have a class with a main method. You can right-click the class in the package explorer or right-click in the editor where you are writing the code for the class and select Run as > Java application.
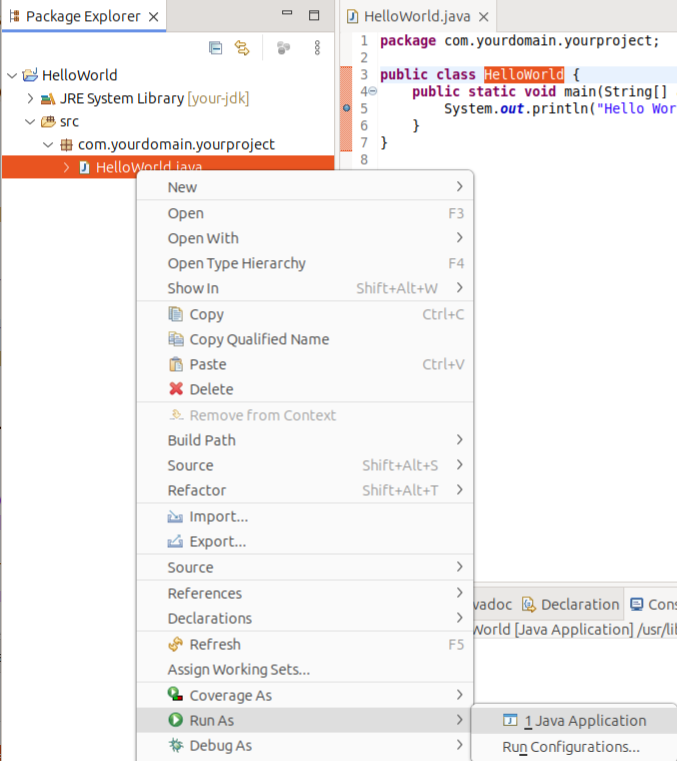
Alternatively, you can run the application using the Run  button in the toolbar.
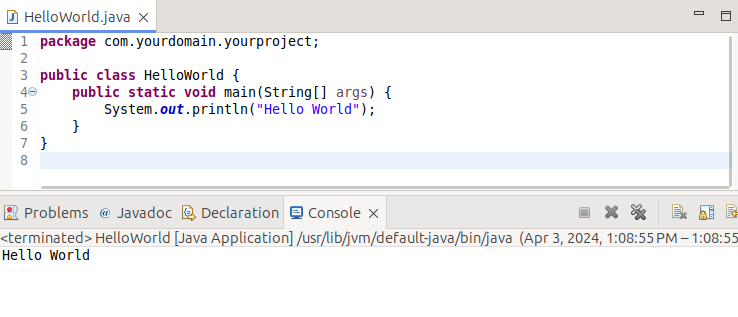
When running the program, Eclipse should show the output of the program in the Console view.
Dealing with Compilation Errors and Warnings
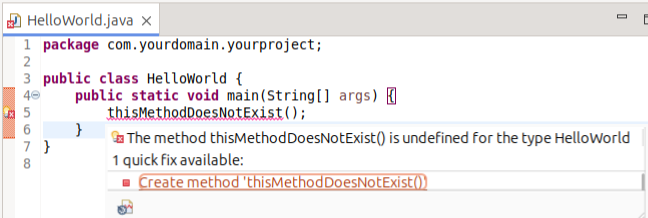
When Eclipse detects a compilation error, the relevant lines are underlined in red. When hovering over the line with the error or the error icon to the left of the said line, Eclipse provides information about what went wrong and also suggests Quick Fixes which can fix the error. However, in many cases, there are multiple ways to get rid of the error. You need to carefully check whether the suggestions are actually matching what you want to do. After all, IDEs cannot predict your intent.
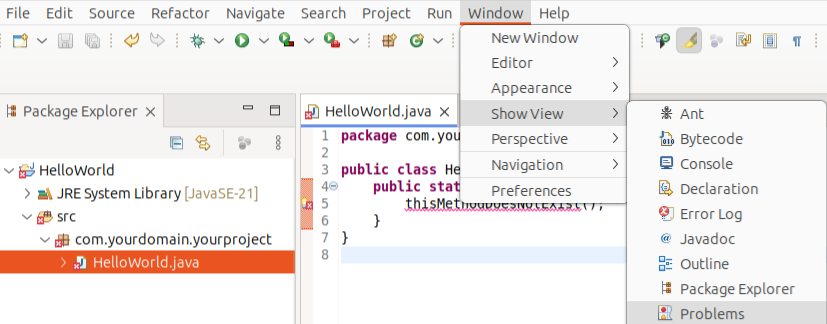
Furthermore, Eclipse shows a list of errors in the Problems view. If this view is not displayed, it can be shown using the menu Window > Show View > Problems.

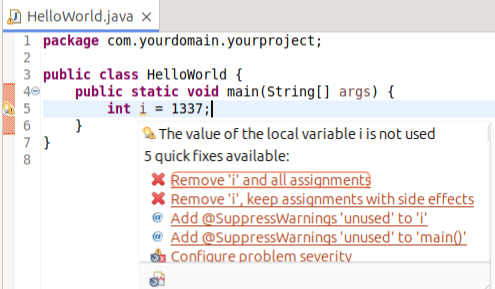
As with Errors, Eclipse can also detect code that compiles but likely contains some issues or is pointless. In this case, Eclipse will display a warning.

Debugging
When a program doesn't do what you expect it to do, you might want to debug it. The process of debugging is explained in this article. Eclipse provides a lot of functionality making it easy to debug Java applications.
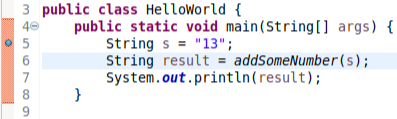
In order to debug an application, you need to set a breakpoint. When the program gets to executing the line with the breakpoint, it will temporarily stop ("suspend"), allow you to inspect its current state and step through the program. To set a breakpoint, you need to double-click on the area to the left of the line you want to suspend the program at. After doing that, a blue dot should appear there.
When running a program normally, it will ignore all breakpoints. For debugging, you need to run the program in debug mode. This can be done by clicking on the green button with the bug icon  next to the run button or using
 Debug As > Java Application.

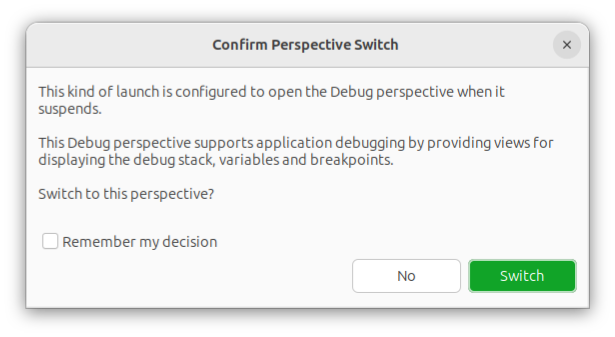
When the program execution gets to a breakpoint in debug mode, Eclipse will ask you to switch to the Debug perspective. This perspective gives you more information about the program you are currently debugging so you likely want to do this and click on the Switch button.
Upon opening the debug perspective, you should still see your code in the middle. However, there should be one line with a green background next to the breakpoint. This indicates the next line the program would execute. On the right side, you should see a Variables view containing a list of variables and their current values.
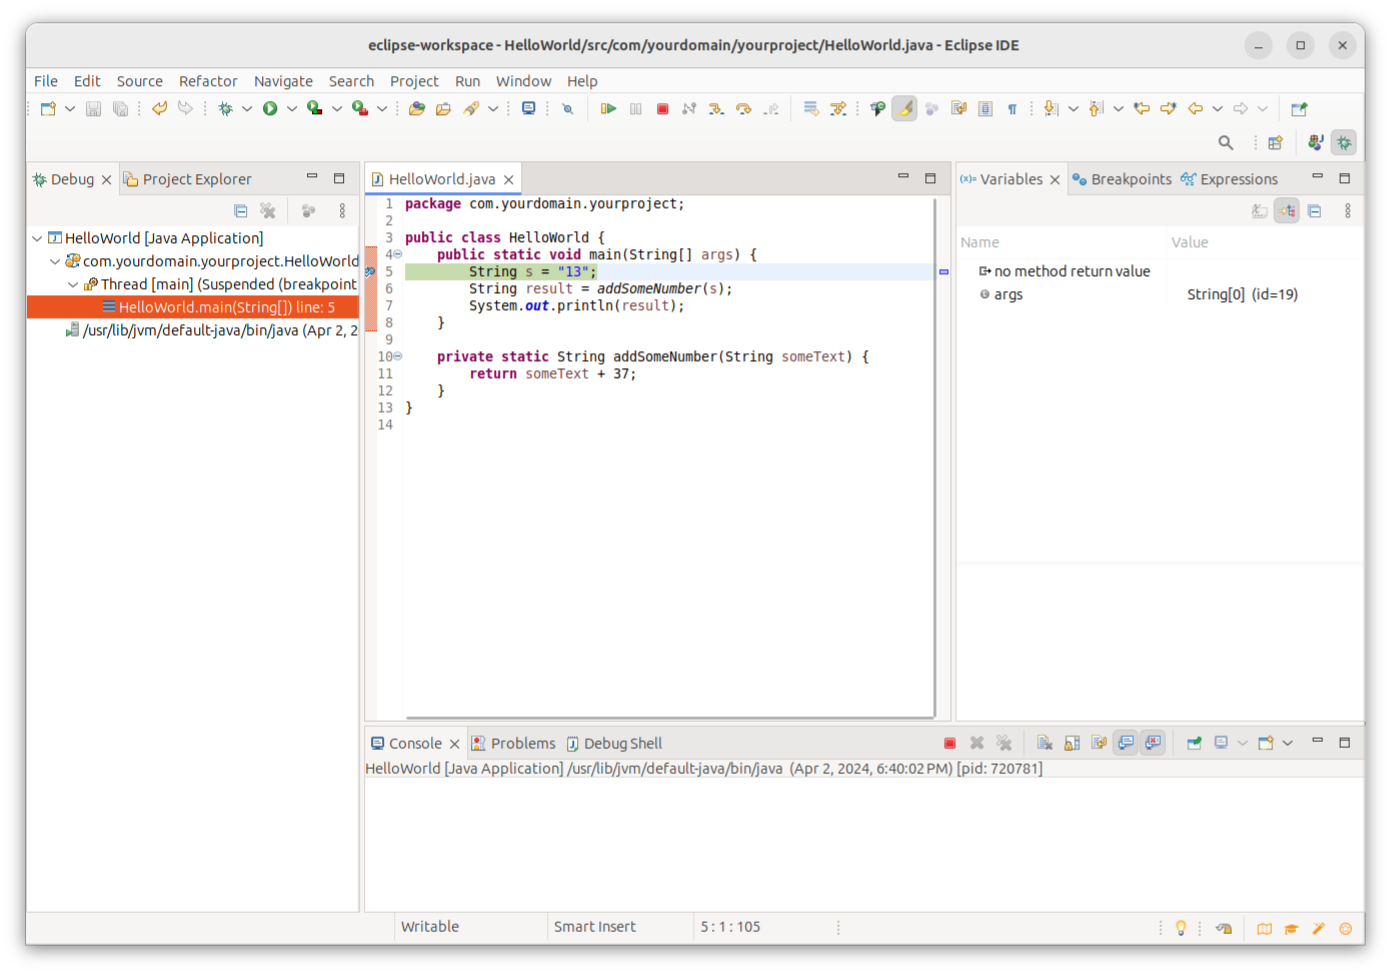
While the program is suspended, you can tell it how to continue executing using buttons in the toolbar at the top.
 You can execute one line using
 Step Over  (
(F6), go into a method using Step Into  (
(F5) or continue executing the program until the next breakpoint with Resume  (
(F8).
Generating Code
Sometimes you might need to write repetitive code that doesn't contain much business logic and can be generated using information from existing code. An example of this is getters/setters or equals/hashCode/toString methods which typically just need to access some fields. While it is often preferable to use records, Eclipse allows comes with functionality to generate these pieces of repetitive code.
In order to do this, you first need to create a class with some fields you want to generate these methods for. In this example, we will create a Person class that stores the first name, last name and age of a person.
When right-clicking in that class, there is an option called Source providing various ways to generate code. Here, we can select Generate Getters and Setters... in order to generate accessor methods for the fields in the Person class.
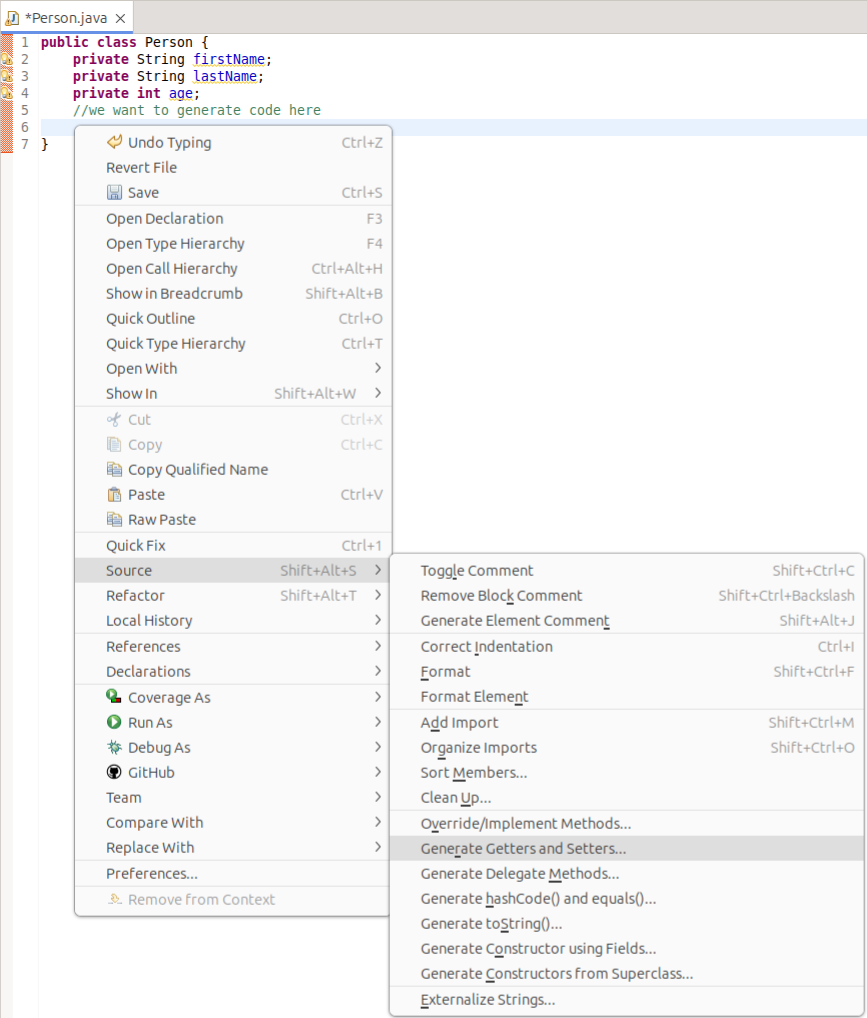
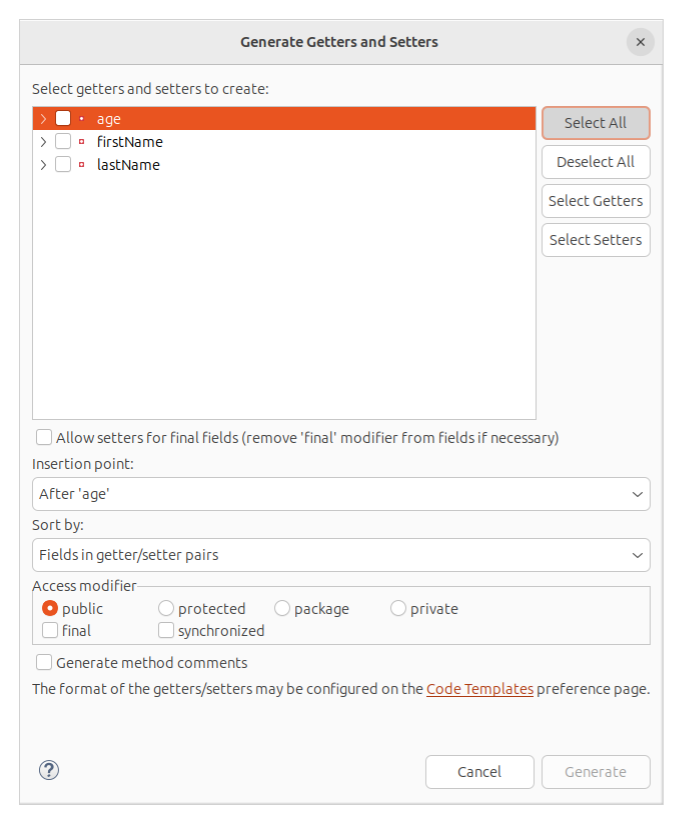
This option should open up a new window allowing us to configure which fields we want to generate accessors for. In order to create accessors for all fields, use the Select All button. and click Generate on the bottom right.
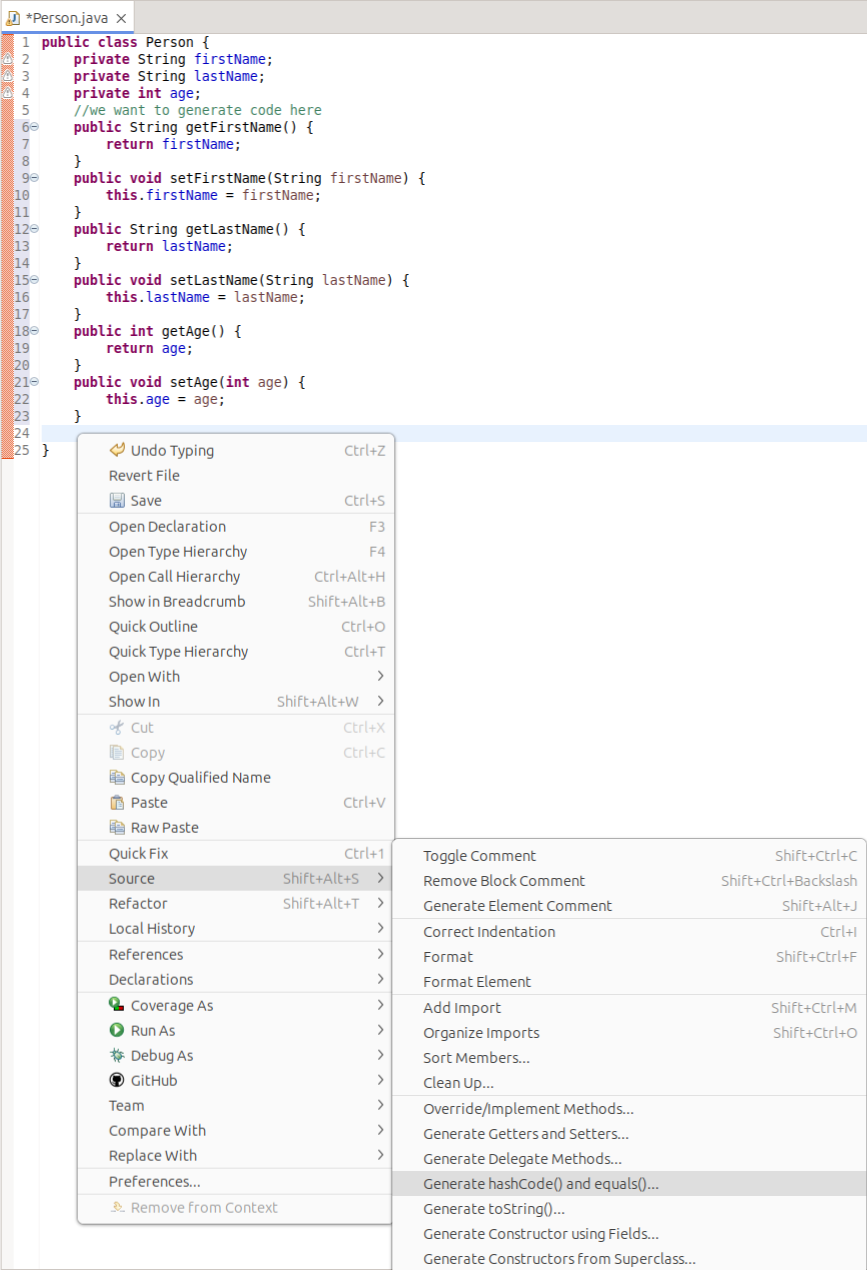
After doing this, the class should look as follows:
Similarly, it is possible to generate the hashCode and equals methods using the menu Source > Generate hashCode() and equals()....
This also opens a window which allows to select the fields to include in the hashCode and equals methods.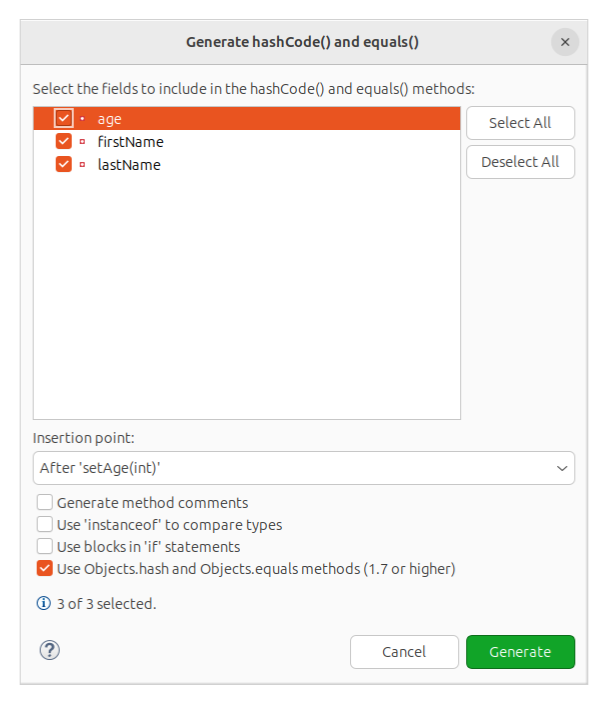
After clicking Generate, Eclipse automatically adds these methods to the class.
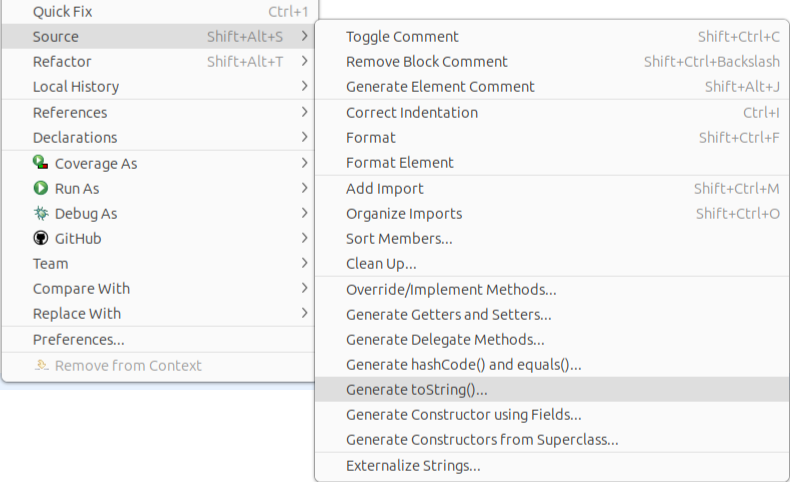
Another method that is often generated is toString() which returns a String representation of the object.
To generate that method, select Generate toString()... in the Source menu.
As before, this opens a window allowing to specify options on how exactly the code should be generated.
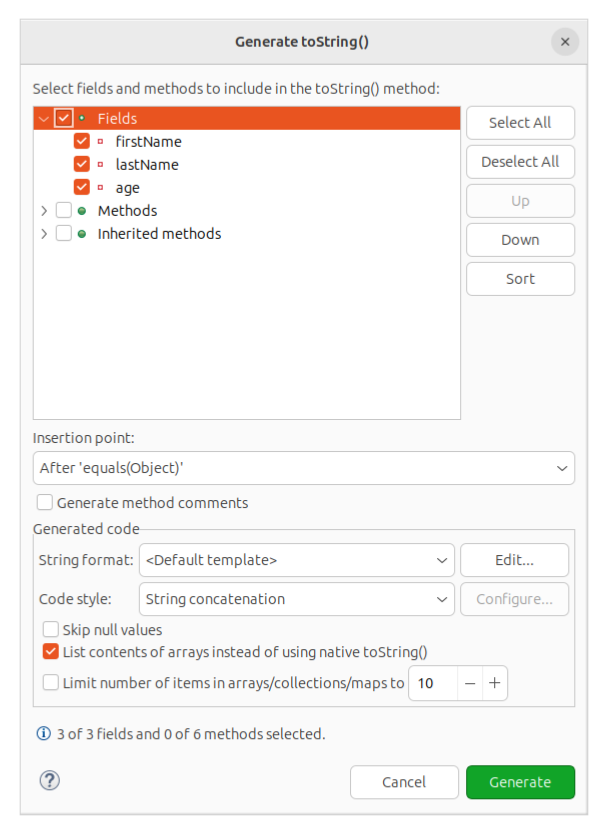
Using the Generate button, Eclipse generates the toString method as it did with the other methods before.
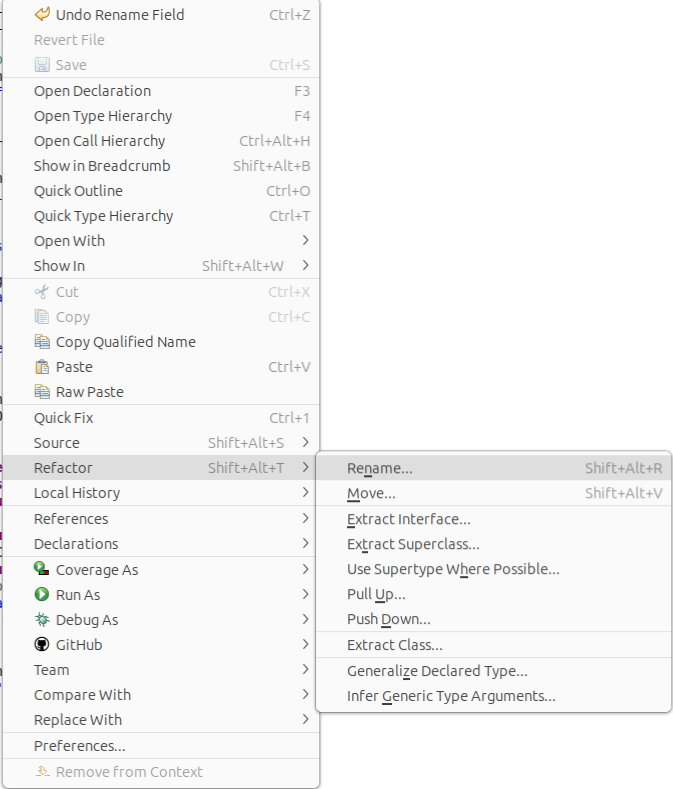
Refactoring
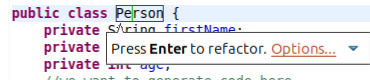
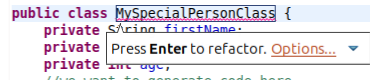
When working on Java applications, it is often necessary to change existing code in various ways while preserving functionality. Eclipse supports developers doing that by providing various refactoring options. An example of that is renaming class, methods or fields. This can be done by clicking on a class, method or variable name, right-clicking and selecting Refactor > Rename.
It is then possible to change to name to something different and confirming it using the Enter key. This also updates all references to the renamed element.
Summary
As you can see, the Eclipse IDE provides a lot of tools that help developers write Java applications. While this article shows some, Eclipse comes with many more features that can be especially useful when working on bigger applications. If you are interested in reading more, check out the Java Development user guide.
Last update: April 22, 2024
Back to Tutorial List